We had a toddler sleep-over recently, after which my daughter asked about our ‘in case of fire’ plan. My immediate response was (if on the second floor) open the nearest window, slide down the roof and hope for a reasonably soft landing. Broken bones aren’t a huge concern if escaping quickly is an issue. But I got the impression that my response was far too loosey goosey. Which brings me to the post today.
…an alternative to sliding down the roof…
I did a fair bit of research on types of escape ladders including reading endless product reviews. The one I chose ticked off all boxes – securely installed…easily accessible….and it included my design diva criteria for looking good or if it couldn’t look good than it had to at least be discretely located. Form follows function used to be the norm, then function followed form but now it’s really a chicken/egg question…the answer to which is the egg of course…you know…potentiality precedes eventuality (has your head exploded yet?). Philosophical discussions aside the only valid concern is to focus on safety first…of course.
Francois installed the first one in the guest room. It meant a little modification….securing extra studs and plastering the wall scar over several days.
As with all renos, a little of us was left behind. A smile for future ‘others’ to discover.
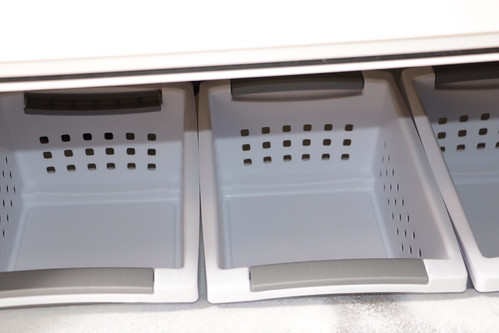
The finished product is discrete, can be painted to match the wall colour and the only remaining factor is to try it out. Which is one of the main reasons I chose this model. If you read the fine print of the ‘hook onto the window sill’ models you will notice that the guarantee is good for one use only. So how can I test it out in advance to make sure it works properly, I might ask?
These have now been installed in both bedrooms. Time for a test. He who has the most weight not she who has height issues…of course!
…a good start.
…seems to be holding.
…safely extracted.
Easy to deploy. Easy to use. Easy to put away. Another marvellous modification at RED by the Sea.
Thanks for stopping by.
For those reading this in a language other than English (see language choice upper right side bar of each post), please forgive the automatic translation.
This is a project we’ve been wanting to tackle for a while now and even though there has been no shortage of ‘additions’ for R.E.D. this winter requiring modifications, what’s one more?
We found a great piece of white oak at our local lumber yard. It’s really a very high end place and every time we visit we drool over the beautiful exotic woods…beautiful teak, wenge, tiger wood, mahogany. They also supply all the bells and whistles needed for any craftman’s hobby from fine carvings and beyond.
But back to our white oak. For last year’s wood trim project (link here and here) it was advised that if we didn’t want to mortgage our life away using teak that white oak was a great alternative as it is very resistant to moisture and was quite often used in ship building.
Wood Cost
Really! When you can walk away with a purchase for any boat and pay this little, it’s a good day. $10 for a piece that will serve this project and more than enough leftover for a couple more that Captain has rolling around in his head. The extra $10 charge was for plaining from 1″ to 5/8″ and cutting in two.
Our Go-To Wood Place
Now on to the making of…
We chose the piece that had the most attractive grain which will hopefully show up well when stained and finished.
White Oak
Onboard R.E.D. there is always enough cardboard for making design templates. We do love our beer and wine.
Template
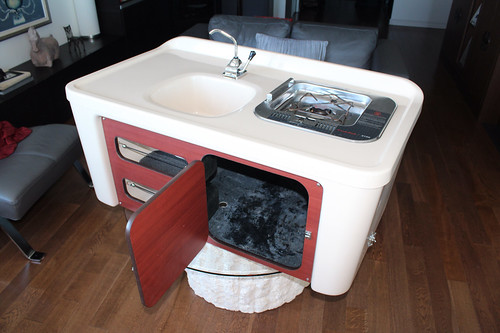
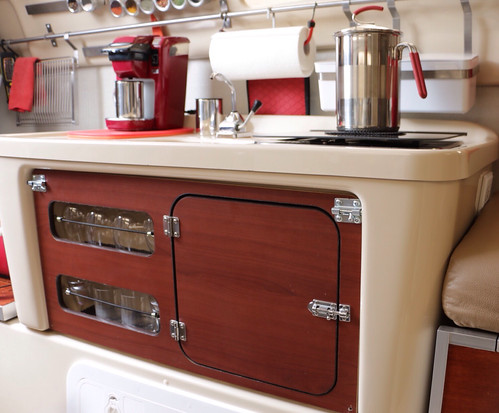
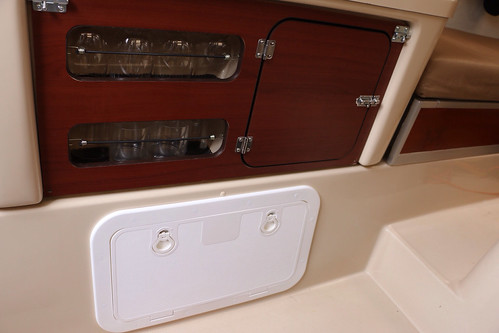
Because we are cutting into an area which could have structural implications, a backing plate will be glued and riveted in place. A secondary benefit will be to soften the edging around the fibreglass so we won’t cut ourselves when accessing the hatch.
Backing Plate Design on Baltic Birch Plywood
Now we’re ready to go back to the boat to check that the template is accurate before cutting.
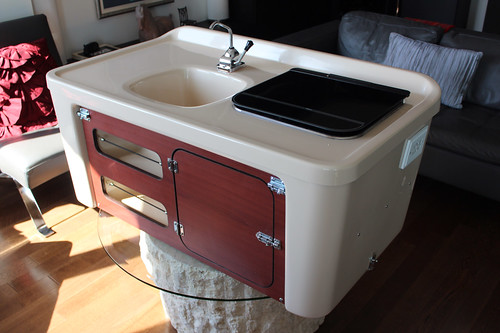
Door Front with Backing Plate
We had a little ‘discussion’ about the shape of the door – a conflict between Francois’ love of wood and my wanting to keep with the existing lines in the cabin. A compromise was reached (Francois’ interpretation: the Galley Kat won this one)
Measure Twice. Cut Once.
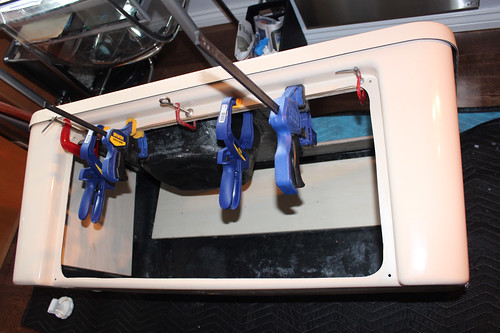
Holes in Each of the Four Corners ( 1.5″)
Dremel to Cut Fibreglass
Door Opening (5″ x 15″)
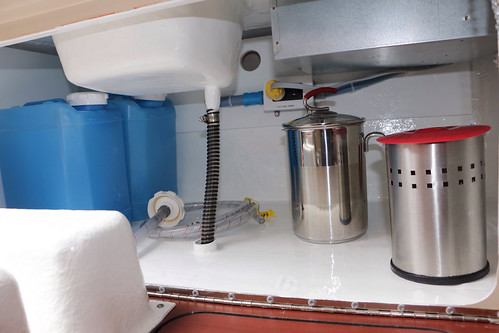
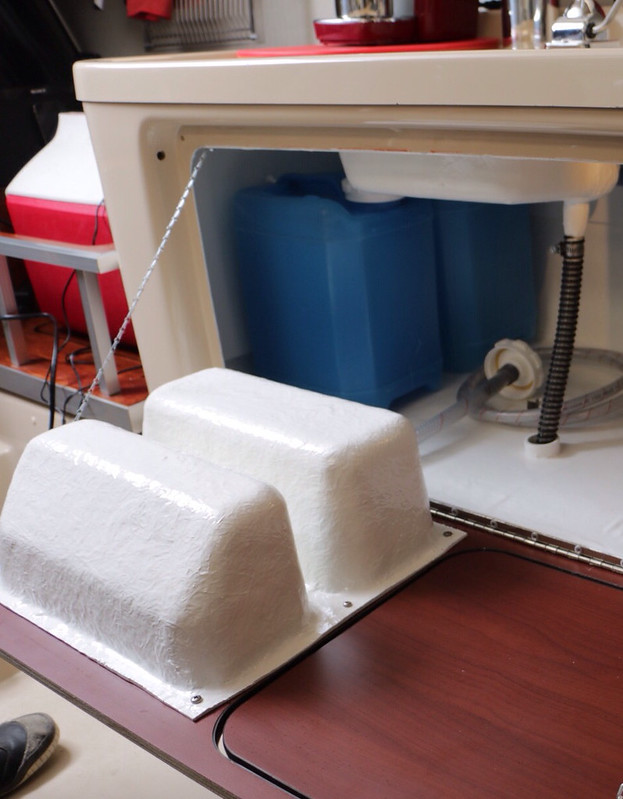
The foam core material was removed and relocated under our black water bladder, startboard V-berth.